The SEO & SEO Agency in Montreal
![]()
What is SEO and why is it necessary?
Positioning yourself at the top of Google’s search results means taking advantage of a powerful, already existing, and formidably qualified acquisition channel. Through accurate keyword research, in almost any market, a constant influx of leads is within reach of your website. In order to prove this, we offer you a free SEO analysis.
Our Montreal agency specializes in the different aspects of SEO in order to offer you an unparalleled return on investment. We offer customized SEO strategies, state-of-the-art audits, ‘ON-site’ or ‘OFF-site’ SEO optimizations (technical, or backlinks), and other unique SEO services.
Our goal: to propel our clients to the top of Google search results, with concrete results in web referencing.
For 10 years, our clients have trusted us because our SEO methods are affordable, effective, and ethical. Whether it’s SEO, web design, paid advertising/SEM management, or technical and semantic audits, our experts are on the cutting edge of performance marketing to support you, in the long term, in your online growth.
SEO pour Google, ChatGPT, Gemini, Bing, Perplexity….
 SEO Montréal Our SEO agency is truly MULTI-CANAL. SEO on ChatGPT and IA do not escape our reference method.. The BlackCat team is only made up of experts, seasoned in several specialties of web marketing. Web, organic, and paid SEO, web development, design, and media. We have a passionate, loyal team, and unique tools, developed in-house, (such as Prediict) – from which our customers, exclusively, benefit.
Our SEO agency in Montreal practices the art of improving the perceived relevance of a website, by search engines, without resorting to paid advertising.
As such, our approach to SEO and web marketing is responsible and ethical, and only answers existing questions. By optimizing your online presence with our recognized SEO agency, you can create a solid asset that enhances your business website and decreases your dependence on paid advertising, by being present in the RIGHT places, for years to come.


BlackCat SEO Montreal celebrates 10 years of SEO in Montreal!
The BlackCat SEO Montreal Label
We optimize content marketing for your SME and its traffic. The SEO strategy is built ‘tailor-made’. We do referencing for your audience
The code, content, structure – are optimized on your site to not lose any traffic. And above all: speed and web performance! Nothing escapes our experts.
From conversion to technical aspects, our SEO agency in Montreal builds a site benefiting from best practices. You stay in control of everything.
We accentuate local backlinks, has strong authority for organic SEO and local SEO. Media publications, PR, etc.
SEO LOCAL
If you have a physical address, your products or services should be searchable on Google Maps, and your website should be optimized for your territory
Using our proprietary SEO tools, we can optimize your texts based on an in-depth analysis of your competitors’ text, your market, and search trends.
By considering your market, your keywords, the state of your site and your promotion, we provide strategies that we are known for: effective and fast.
Take advantage of our network of journalists and influencers to spread the word about your brand, and take advantage of contextual and powerful SEO signals.
What is said about you can be an issue. We have techniques for covering or removing certain content. Contact us!
Writing for your audience is an art – and writing for a web audience is a science. Our copywriters cover your SEO or press copywriting needs.
SEO Frequently Asked Questions
Let’s talk about your project:
Customer Testimonials
 blackcatseo.ca
5290 Des Erables, Montréal
-
Antonin et son équipe offrent un excellent service. Ils sont réactifs, et ont l'expérience et les connaissances pour nous aider dans notre position web. Merci à l'équipe :)
-
J’ai l’honneur de collaborer avec toute l’équipe de Blackcat SEO, depuis plusieurs années, et je ne peux que les recommander chaleureusement. Leur expertise dans les différents aspects du SEO est tout simplement inégalée. … More
L’équipe d’Antonin propose des stratégies SEO personnalisées qui ont considérablement amélioré le retour sur investissement de mes clients. Leurs audits de pointe et leurs optimisations SEO, qu’elles soient « ON-site » ou « OFF-site », sont toujours méticuleusement réalisés. Ils maîtrisent aussi bien les techniques SEO que la création de backlinks de qualité.
Leur approche unique et leurs solutions sur mesure m’ont permis ainsi que mes clients de voir des résultats tangibles et durables. Si vous cherchez des experts en référencement naturel pour faire passer votre entreprise au niveau supérieur, je vous recommande vivement Antonin et toute l’équipe de Blackcat SEO. -
Nous sommes impatients de poursuivre notre collaboration avec BlackCat Seo afin de continuer à développer notre présence en ligne. Leur équipe est toujours à l'affût des dernières tendances et technologies en … More matière de SEO, ce qui nous permet de rester à l'avant-garde dans notre secteur. Grâce à leurs efforts constants et à leur approche proactive, nous avons pu atteindre de nouveaux sommets et attirer un public plus large et plus engagé.
Antonin et son équipe ne se contentent pas de fournir des résultats, ils bâtissent également des relations de confiance avec leurs clients. Leur disponibilité et leur réactivité sont exemplaires, et ils n'hésitent jamais à aller au-delà de ce qui est attendu pour assurer notre succès. Si vous recherchez des professionnels passionnés et efficaces pour booster votre visibilité en ligne, ne cherchez pas plus loin que BlackCat Seo. Leur travail dépasse toutes les attentes, et nous sommes honorés de les avoir comme partenaires.
Encore un grand merci à Antonin et à toute l'équipe pour leur dévouement et leur travail remarquable. Vous avez transformé notre présence en ligne et nous en sommes extrêmement reconnaissants. -
Une équipe de SEO hors pair !
Je tiens à exprimer ma profonde gratitude en attribuant 5 étoiles bien méritées à Antonin et à l'ensemble de l'équipe de BlackCat SEO pour leur travail exceptionnel. Il est … More véritablement rare de croiser le chemin de professionnels aussi dévoués et talentueux dans le domaine du référencement naturel.
Leur expertise approfondie, combinée à leur approche personnalisée, a permis d'accroître significativement la visibilité de mon entreprise sur les moteurs de recherche. Grâce à leurs conseils avisés et à leur accompagnement constant, j'ai pu constater une nette amélioration de mon positionnement et de ma notoriété en ligne.
La réactivité et la disponibilité d'Antonin et de son équipe sont également à souligner. Ils ont toujours su répondre à mes interrogations et m'ont guidé à chaque étape de notre collaboration. Leur professionnalisme et leur dévouement sont des atouts précieux qui font toute la différence.
Je recommande chaudement les services de BlackCat SEO à toute personne ou entreprise souhaitant optimiser son référencement et booster sa présence sur le web. Un grand merci à Antonin et à toute l'équipe pour leur engagement et leur savoir-faire ! -
Je tiens absolument à remercier chaleureusement Antonin et toute l'équipe de BlackCat Seo pour leur travail remarquable et le service client hors pair qu'ils fournissent à chaque fois.
Leur expertise pointue … More en SEO est tout simplement impressionnante. Ils maîtrisent parfaitement tous les aspects de l'optimisation pour les moteurs de recherche, que ce soit la stratégie de mots-clés, le linkbuilding, l'optimisation on-page ou les aspects plus techniques. Grâce à leurs efforts ciblés et intelligents, le trafic et le classement de mon site se sont considérablement améliorés.
Mais au-delà de leurs grandes compétences, ce qui distingue vraiment Antonin et son équipe, c'est leur dévouement sans faille envers leurs clients. Ils sont toujours ultra réactifs, à l'écoute, prêts à donner des conseils avisés. On sent qu'ils se donnent à 200% pour la réussite de chaque projet. C'est tellement rare et précieux d'avoir un prestataire aussi impliqué et passionné.
En résumé, je recommande BlackCat Seo les yeux fermés à quiconque souhaite booster son référencement naturel de façon sérieuse et pérenne. Vous pouvez leur faire une confiance absolue, vous ne serez pas déçus! Un immense merci à Antonin et son équipe, continuez votre superbe travail. -
★★★★★
Je donne 5 étoiles à Antonin et à toute l'équipe de BlackCat SEO pour leur travail exceptionnel. Il est rare de rencontrer des experts aussi dévoués et talentueux en matière de référencement (SEO).
Grâce … More à leur expertise approfondie et leur approche personnalisée, nous avons constaté une amélioration significative de notre visibilité en ligne, ce qui a eu un impact positif sur notre entreprise.
Ils ne se contentent pas d'appliquer des stratégies de référencement classiques, mais vont au-delà en proposant des solutions innovantes qui répondent spécifiquement à nos besoins.
Leur communication est excellente, ce qui permet une collaboration fluide et efficace. En résumé, si vous cherchez à booster votre présence en ligne, BlackCat SEO et son équipe sont le choix par excellence. -
Un partenaire de confiance pour le SEO, nous collaborons depuis plus d'an et le service personnalisé de l'équipe fait toute la différence!
-
BlackcatSEO est une agence exceptionnelle qui a considérablement amélioré notre visibilité en ligne. Leur expertise et leur dévouement nous ont permis d'atteindre des résultats impressionnants en un temps record. … More Well Done à la team!!
-
-
Antonin and his team have done a great job and have proven, through my experience with them, a high level of commitment, weekly follow-up, and important advice that increases the success of the company and the spread … More of the site. I advise every company to choose Black Cat. Thank you, Antonin, for your continued effort with us
-
L'équipe est géniale! Elle a su mettre mon site web sur la mappe! Maintenant, lorsqu'on tape planificateur financier, Montréal, nous sortons sur la première page et tout cela sans aucun budget de publicité. … More
Merci à toute l'équipe! -
The team at BlackCat has work hard and has been effective at building a strong SEO presence for Stemregen. Thank you BlackCat Team!
-
I always receive an excellent service and these people really know their area of expertise.
-
Honnêtes, dévoués et habiles. Extraordinaire en termes de qualité et résultats. Transparents et fiables. Je n’ai que eu des expériences positives. Un grand merci à toute l’équipe. Je ne regarderai pas ailleurs pour … More mes besoins.
-
Great experience, gain of qualified traffic, and lots of explanations along the way...


Some SEO cases:

SEO Resources
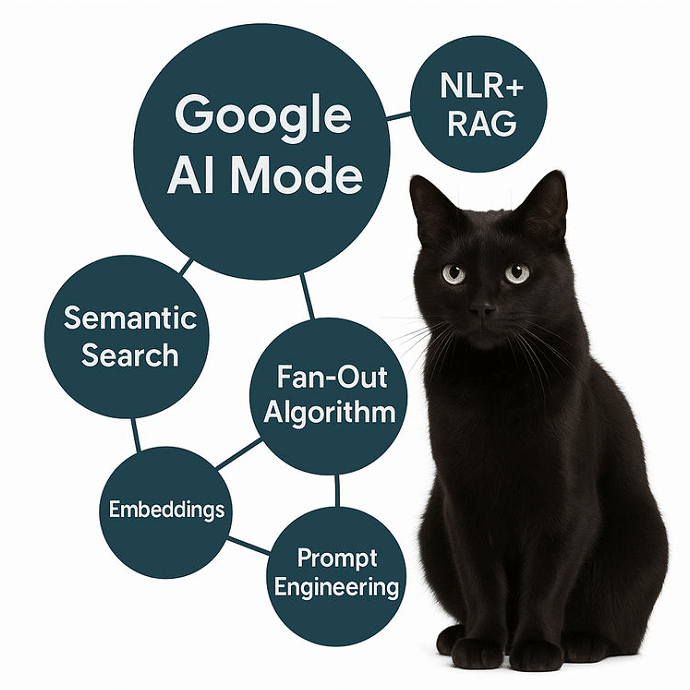
The SEO of 2025 is an SEO of AI Mode.
I was recently shared with an article from La Presse entitled: Why Google is scuttling the web. A title that already translates [...]
SEO as a strategic weapon: dominating searches at the expense of American companies
The current situation can be seen as an illustration of the economic war that we, Quebec entrepreneurs, wage every day, on [...]

Improve Video SEO with Leak; Multimodality, anchors, and more
Everyone knows it, and influencers especially. With the rise of multimedia content, especially videos, video optimization for SEO has become an essential [...]